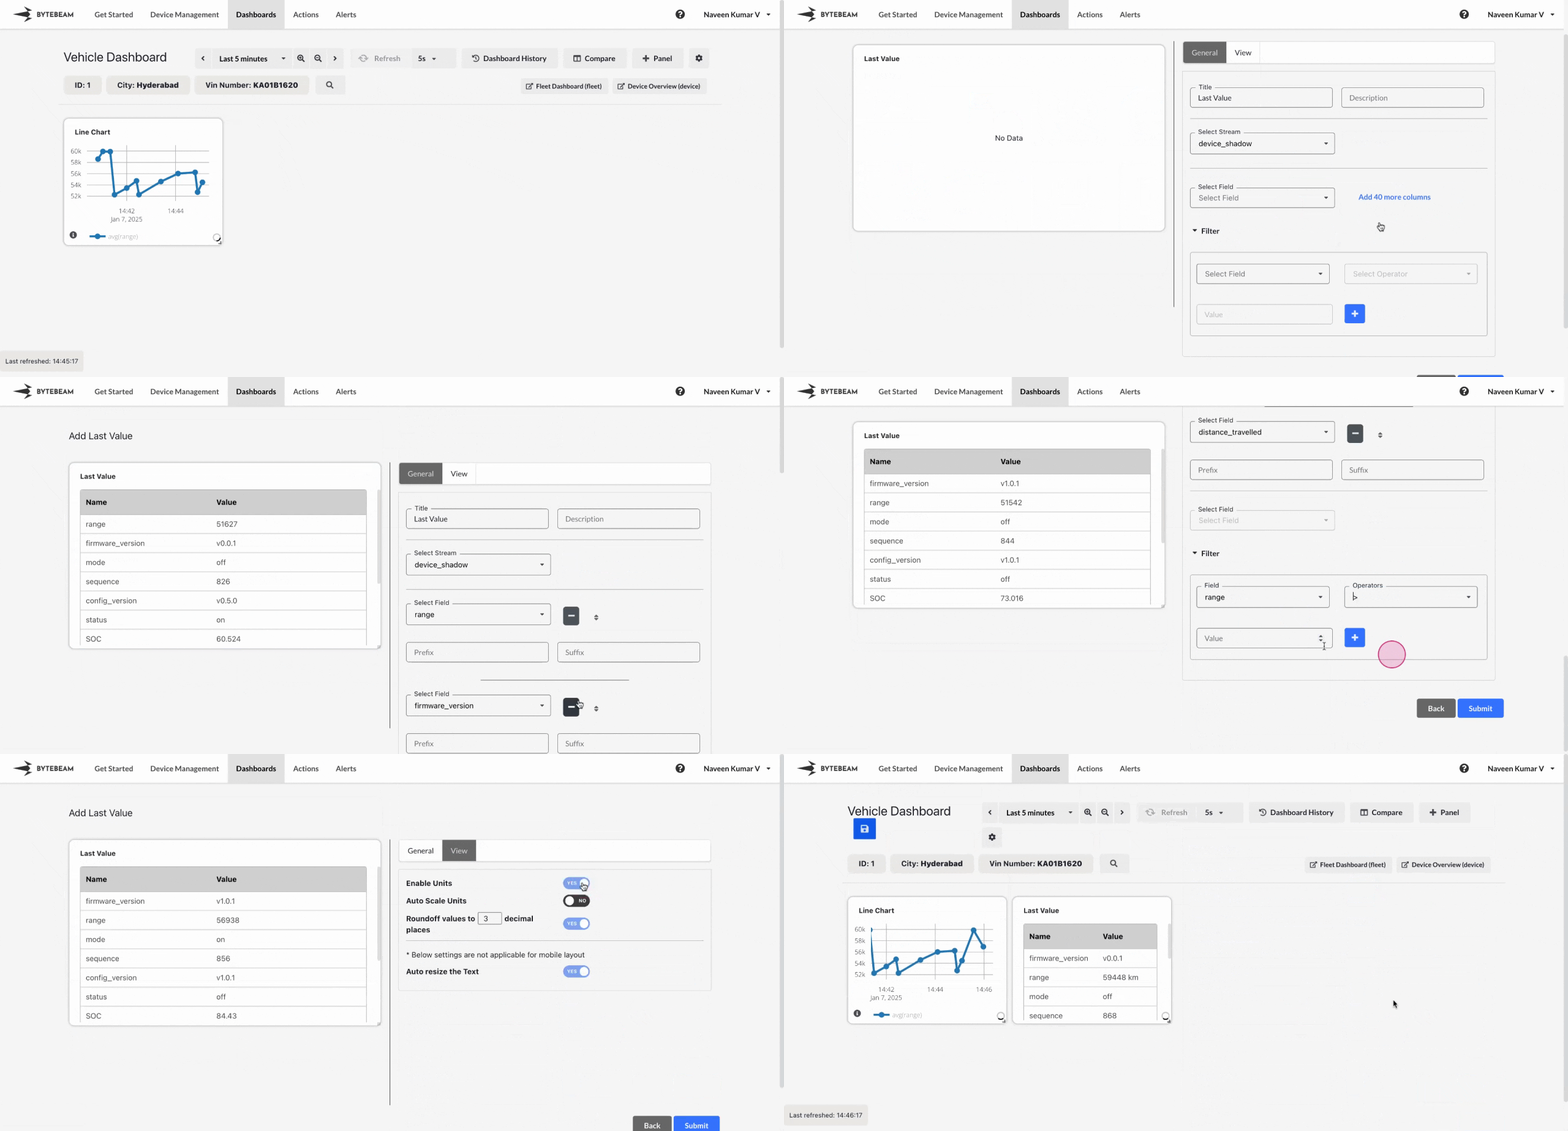
Add Last Value Panel
1
Navigate to Dashboards
Go to the Dashboards tab, select the desired dashboard, and click on the + Panel button to create a new panel.
2
Select Last Value Panel
Choose Last Value Panel from the list of available panels. 

3
Customize General Settings
Configure the following under the General Settings tab:
- Add a Title: Provide a name for the panel to represent its purpose.
- Description: Optionally, add a short description for context.
- Select Stream: Choose the data stream from which the most recent value will be displayed.
- Select Field: Pick the column (field) from which the latest value will be extracted. Choose individual columns to display or click Add 40 More Columns to include all available columns upto 40.
4
Apply Filters
Refine the data to be displayed using the Filters section:
- Select Field: Choose the column to apply the filter.
- Select Operator: Set the filter condition (e.g., equals, not equals, greater than).
- Enter Value: Provide the value for the selected filter.
- Click + to apply more filters as needed.
5
Customize View Options
Switch to the View Options tab to personalize the panel’s appearance:
- Enable Units: Display the appropriate unit for the value (e.g., °C, %, MB).
- Round Off Values: Set the number of decimal places for the displayed value.
- Auto Resize: Adjust the font size for better readability.
6
Submit the Panel
Once all customizations are complete, click Submit to add the Last Value Panel to the dashboard.